Learn how to make a beautiful crochet heart pillow with this complete step-by-step guide, perfect for all skill levels.
Anúncios
Crochet heart pillows are not only adorable and fun to make, but they’re also a thoughtful handmade gift.
Whether you’re making one for Valentine’s Day, home decor, or a special occasion, this project brings love and creativity together.
The heart pillow is a great way to practice shaping techniques, increases, decreases, and basic assembly.
With simple materials and a little time, you can craft a charming and cozy item that adds personality to any space.
This guide will walk you through every step of the process, from materials to finishing touches.
Even if you’re a beginner, you’ll find this project easy to follow and deeply rewarding.
Let’s get started with everything you need to know to crochet your very own heart-shaped pillow.
Materials Needed
Before starting your crochet heart pillow, gather the following supplies.
1. Yarn
Use a medium-weight (worsted) yarn in your favorite color.
Red, pink, or white are popular choices, but you can use any color that matches your style.
Choose soft, plush yarn for a cozy pillow or cotton for a firmer, decorative piece.
You’ll need about 300 to 400 yards depending on the pillow size.
2. Crochet Hook
A 5.0 mm (H-8) hook works well for worsted-weight yarn.
Adjust the hook size based on your desired tension and yarn type.
If your pillow looks too loose or has visible gaps, try a smaller hook.
3. Stuffing
Polyester fiberfill is perfect for a soft and huggable pillow.
You can also use fabric scraps, old pillow stuffing, or eco-friendly fill.
Stuffing should be soft but firm enough to hold the heart shape.
4. Stitch Marker
Use a stitch marker to track the beginning of each round if working in the round.
This helps keep your shape consistent and even.
5. Yarn Needle
You’ll need a yarn needle to sew pieces together and weave in ends.
Choose one with a large eye that easily fits your yarn.
6. Scissors
Sharp scissors are essential for trimming yarn ends cleanly.
Crochet Stitches Used
This pattern uses only basic crochet stitches, making it perfect for beginners.
1. Chain (ch)
The chain stitch is the foundation of most crochet projects.
It’s used to start shapes and form loops in patterns.
2. Single Crochet (sc)
Single crochet is a tight, dense stitch used for structure and shaping.
It gives the pillow a smooth and sturdy surface.
3. Increase (inc)
An increase is made by placing two single crochets in the same stitch.
This expands the shape and helps form curves.
4. Decrease (dec)
A decrease is worked by crocheting two stitches together.
This narrows the shape and creates the pointed tip of the heart.
Step-by-Step Instructions to Crochet a Heart Pillow
Follow these steps to make a classic heart-shaped pillow using single crochet stitches.
Step 1: Create the First Heart Bump
Start with a magic ring or chain 2 and work into the first chain.
- Work 6 single crochets into the ring.
- Increase in each stitch around (12 sc).
- 1 sc, inc repeat around (18 sc).
- 2 sc, inc repeat around (24 sc).
- 3 sc, inc repeat around (30 sc).
Fasten off and make a second identical piece but do not fasten off the second one.
This forms the two rounded tops of the heart.
Step 2: Join the Heart Bumps and Work the Body
With the second bump still attached to your yarn, chain 1 and join to the first bump with a single crochet.
Continue working single crochets around both circles to join them into one piece.
You should have around 60 stitches total after joining.
Continue working in single crochet around for 3–4 rounds to build height.
Now begin shaping the heart by adding decreases.
Step 3: Shape the Heart Point
Start decreasing at four evenly spaced points across the round.
Next Round: 8 sc, dec repeat (54 sc).
Next Round: 7 sc, dec repeat (48 sc).
Continue decreasing each round using this formula until only 6–8 stitches remain.
Once you reach the bottom, fasten off and leave a long tail for sewing.
If your stitches seem tight, take care not to overstuff before shaping.
Step 4: Stuff the Pillow
Begin stuffing once the heart is about halfway closed.
Add small amounts of stuffing at a time and shape as you go.
Make sure the edges are firm and smooth to hold the heart shape.
Fill until the pillow feels full but still soft and cuddly.
Be careful not to stretch the stitches with too much stuffing.
Step 5: Close and Finish
Using your yarn needle, sew the remaining stitches at the point of the heart closed.
Weave in the yarn tail securely and trim any excess yarn.
Adjust the shape by massaging and smoothing the pillow.
If desired, steam-block gently for a neater finish.
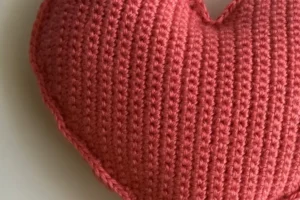
Your crochet heart pillow is now complete and ready to enjoy.
Optional Additions and Variations
Once you master the basic heart pillow, you can customize it in fun and creative ways.
1. Add a Border
Crochet a round of single crochet around the edge in a contrasting color.
This adds a decorative frame and a professional look.
You can also try scalloped or shell borders for a romantic touch.
2. Make It Multicolor
Use different colors for each bump or make stripes across the body.
Ombre yarn or variegated skeins add a lovely effect without color changes.
3. Add a Face or Embroidery
Sew on felt eyes and a smile for a cute amigurumi-style heart.
You can also embroider a name, message, or initials onto the front.
Hearts with personal touches make meaningful gifts.
4. Attach a Pocket
Add a small heart-shaped pocket to the front to hold love notes or tiny gifts.
Simply crochet a small flat heart and sew it onto the front of the pillow.
Perfect for Valentine’s Day or anniversaries.
Tips for Success
Here are some helpful tips to ensure your crochet heart pillow turns out beautifully.
1. Use Tight Stitches
Tight stitches prevent stuffing from showing through the fabric.
If your stitches are loose, use a smaller hook.
2. Count Carefully
Keep track of your stitch count to maintain symmetry.
Use a stitch marker at the beginning of each round if needed.
3. Check the Shape as You Go
Hearts need balance, so check that both sides match in size and shape.
Adjust stuffing and stitch placement as you work.
4. Block Before Stuffing (Optional)
If your pieces curl, lightly block them before joining and stuffing.
This helps maintain the desired shape and smooth finish.
Where to Use a Crochet Heart Pillow
These pillows are more than cute—they’re also functional and decorative.
-
Bedroom Decor – Add a romantic or playful accent to your bed.
-
Nursery Item – Perfect for a baby’s room in soft pastel colors.
-
Couch Accent – Add a pop of love to your living room or reading nook.
-
Gifts – Handmade pillows make thoughtful birthday, Valentine’s, or anniversary gifts.
-
Wedding Decor – Use as part of a handmade wedding or bridal shower setup.
You can even scale up the pattern with chunky yarn and a bigger hook for a dramatic statement piece.
Free Patterns and Video Tutorials
If you prefer following along with a visual guide, here are some great options.
-
YouTube Channels: Bella Coco, The Crochet Crowd, and HappyBerry Crochet.
-
Blogs: Repeat Crafter Me, Yarnspirations, and Moogly Blog.
-
PDF Patterns: Check Ravelry and Etsy for heart pillow patterns with downloadable formats.
Choose the style that works best for you—written, charted, or video.
Crocheting a heart pillow is the perfect way to express creativity and affection in one cozy project.
With just basic stitches and simple shaping, you can craft something that brings comfort and smiles.
Whether you’re making it for yourself or as a gift, each stitch is filled with warmth and love.
Customize your pillow with colors, embroidery, or borders to make it truly unique.
Use this project to practice your crochet skills and create something beautiful and heartfelt.
Now that you know how to make a crochet heart pillow step by step, it’s time to grab your yarn and hook.
Let your heart—and hands—lead the way.