Create a charming and functional table protector using this step-by-step crochet rabbit guide perfect for festive and everyday decor.
Anúncios
Crocheting your own table protector in the shape of a rabbit is a fun and creative way to combine practicality with seasonal charm.
Whether you’re preparing for Easter, decorating a child’s table setting, or simply adding whimsy to your dining decor, a crochet rabbit table protector is the perfect DIY project.
It protects your furniture from heat and scratches while serving as a delightful handmade centerpiece.
Even better, it’s an ideal crochet project for beginners and intermediate crafters alike.
You’ll learn how to shape the body, create floppy ears, add adorable facial features, and finish with sturdy stitching.
In this tutorial, you’ll be guided through each step of creating your own crochet rabbit table protector.
From choosing yarn to final touches, everything you need is here.
Let’s hop into it and start crafting your own crochet rabbit masterpiece.
Materials Needed for a Crochet Rabbit Table Protector
Gathering the right supplies ensures that your crochet rabbit table protector turns out cute and durable.
1. Yarn
Use 100% cotton yarn for its strength, heat resistance, and ease of cleaning.
Choose soft pastel colors for the rabbit’s body such as white, cream, beige, or gray.
You’ll also want pink for the nose and ears, and black or brown for the eyes.
You’ll need approximately 250–300 yards of yarn in total depending on the size.
2. Crochet Hook
A 4.0 mm (G) or 4.5 mm (7) hook is ideal for cotton yarn and creates a dense, solid fabric.
Using a smaller hook helps avoid gaps and creates a firmer shape.
3. Stitch Marker
Mark the beginning of each round to keep your work even and consistent.
Especially important when working in continuous spirals.
4. Tapestry Needle
Used for sewing pieces together and weaving in yarn tails.
Look for a blunt tip and large eye for easy threading.
5. Scissors
Sharp scissors will be needed to trim yarn ends and shape details cleanly.
6. Hot Pad Lining (Optional)
To add heat protection, you can insert a layer of felt, fabric, or thermal lining between the top and bottom layers.
Make sure the material is washable and heat-resistant.
Basic Crochet Stitches Used
This crochet rabbit table protector requires only basic crochet stitches.
1. Chain (ch)
Used to begin rounds and shape details.
Provides the foundation for most pieces.
2. Single Crochet (sc)
A tight, simple stitch that forms the base of most pieces.
Great for building sturdy, smooth surfaces.
3. Increase (inc)
Two single crochet stitches in the same stitch to expand the shape.
Used to grow circles and create curved areas.
4. Decrease (dec)
Crochet two stitches together to reduce the total stitch count.
Essential for shaping ears and tapering sections.
Step-by-Step Guide to Making a Crochet Rabbit Table Protector
Let’s walk through the full construction of the table protector in rabbit form.
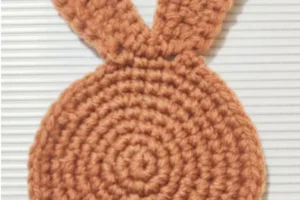
Step 1: Crochet the Rabbit Face Base
This is the main circular piece that forms the face of your crochet rabbit.
Start with a magic ring.
Round 1: 6 sc in the ring (6)
Round 2: Inc in each stitch around (12)
Round 3: 1 sc, inc around (18)
Round 4: 2 sc, inc around (24)
Round 5: 3 sc, inc around (30)
Continue increasing this way until the circle is approximately 10 to 12 inches in diameter.
Fasten off and weave in the ends.
This base is the face of your rabbit.
Step 2: Create the Back Panel
To add extra protection and thickness, make a second identical circle.
Repeat the same steps as for the face base.
You can add a layer of felt or thermal pad between the two circles.
Join the front and back using a round of single crochet through both layers.
Use the same color as your base to keep the edge clean and unified.
Step 3: Crochet the Rabbit Ears
Now let’s make two floppy ears to attach to the top of the rabbit face.
Ear (Make 2):
Ch 9
Row 1: Sc in second chain from hook and across (8)
Rows 2–10: Sc across (8)
Row 11: Dec, sc across until 2 remain, dec (6)
Row 12: Sc across (6)
Row 13: Dec, sc across, dec (4)
Row 14: Sc across (4)
Fasten off and leave a long tail for sewing.
Fold the base of the ear slightly and sew to the top sides of the face.
Position them slightly outward for a natural, relaxed look.
Step 4: Crochet the Nose and Cheeks
These small features add personality and charm to your crochet rabbit.
Nose
With pink yarn:
Magic ring, 6 sc, fasten off.
Flatten slightly and sew to the center lower part of the face.
Cheeks (Make 2)
With light pink:
Magic ring, 6 sc, inc in each stitch (12)
Fasten off and sew symmetrically on either side of the nose.
You can also embroider rosy cheeks using simple stitches in pink thread.
Step 5: Add the Eyes
You can either use safety eyes or embroider them with black yarn.
For embroidered eyes:
Use black yarn to create two horizontal stitches spaced 6–8 stitches apart.
Add small white highlights to give life and sparkle.
If using safety eyes, insert them before sewing the front and back together.
Place them above the cheeks and spaced evenly across the face.
Step 6: Add Whiskers and Eyebrows
These optional additions bring expression to your rabbit.
Using black or dark gray yarn, embroider three whiskers on each cheek.
You can also add two curved lines above the eyes for eyebrows.
Make them subtle for a gentle expression or exaggerated for personality.
Step 7: Crochet a Bow or Flower (Optional)
For a decorative touch, add a small bow between the ears or on one side.
Bow
Ch 20, join with sl st to form a loop.
Round 1: Sc in each stitch around, join.
Wrap yarn tightly around the center to pinch it into a bow shape.
Sew it securely onto the rabbit’s head.
Flower
Make a 5-petal flower and attach near one ear or cheek.
These accessories are great for seasonal themes like Easter or birthdays.
Step 8: Final Assembly and Finishing
Double-check that all parts are sewn securely.
Weave in all yarn tails and trim any loose threads.
Use a gentle steam block to flatten the finished piece.
Let it cool and dry completely before placing it on a table.
If using a liner inside, ensure it’s firmly enclosed between the circles.
You now have a handmade crochet rabbit table protector ready for use.
Tips for Success
These tips will help ensure a polished and functional result.
1. Use Cotton Yarn
Cotton is heat-resistant and durable, making it ideal for table protection.
Avoid acrylic yarns if the protector will be used under hot dishes.
2. Keep Stitch Tension Tight
A dense fabric prevents gaps and holds shape better.
If needed, switch to a smaller hook for tighter stitches.
3. Block Finished Pieces
Light steam blocking helps even out the shape.
Use a towel or cloth to protect the yarn from direct heat.
4. Sew with Matching Yarn
Use the same yarn color when attaching ears and details to keep seams invisible.
Anchor securely to prevent loosening during washing.
Creative Variations of the Crochet Rabbit
You can personalize the table protector with creative changes.
-
Use Different Colors: Try gray, brown, or pastel shades for different rabbits.
-
Add Glasses: Embroider circular glasses for a scholarly bunny look.
-
Holiday Themes: Add tiny eggs or a Santa hat depending on the season.
-
Use Buttons or Felt: Add accessories with buttons (for adult use) or stitched felt details.
-
Mini Versions: Create smaller coasters with the same design for a complete set.
Washing and Care Instructions
Proper care ensures your crochet rabbit stays clean and usable.
-
Hand Wash or Machine Wash (Delicate): Use cold water and mild detergent.
-
Dry Flat: Lay flat on a towel to maintain shape and prevent warping.
-
Do Not Bleach: Harsh chemicals may weaken the yarn.
-
Avoid Heat: Do not iron or place near direct heat sources.
Where to Use the Crochet Rabbit Table Protector
This adorable piece can brighten up any space beyond the dining table.
-
Kids’ Table Settings: Makes meals more fun and encourages careful eating.
-
Easter Centerpieces: Use it under a vase or basket of eggs.
-
Coffee Tables: Add a soft touch to living room decor.
-
Gifts: A thoughtful handmade item for rabbit lovers or new parents.
-
Spring Decor: Perfect for seasonal decor and themed parties.
A crochet rabbit table protector is a delightful and useful project that brings both form and function to your space.
It’s easy enough for beginners and customizable enough for advanced crocheters to get creative.
With simple stitches, soft yarn, and some personal flair, you can turn basic crochet into an adorable household accessory.
Whether you make it for yourself, for the holidays, or as a handmade gift, it’s sure to make any table setting extra special.
Now that you’ve learned how to make a table protector in a crochet rabbit format, it’s time to grab your hook and bring your bunny to life.
Hop to it—and enjoy every stitch of the journey.