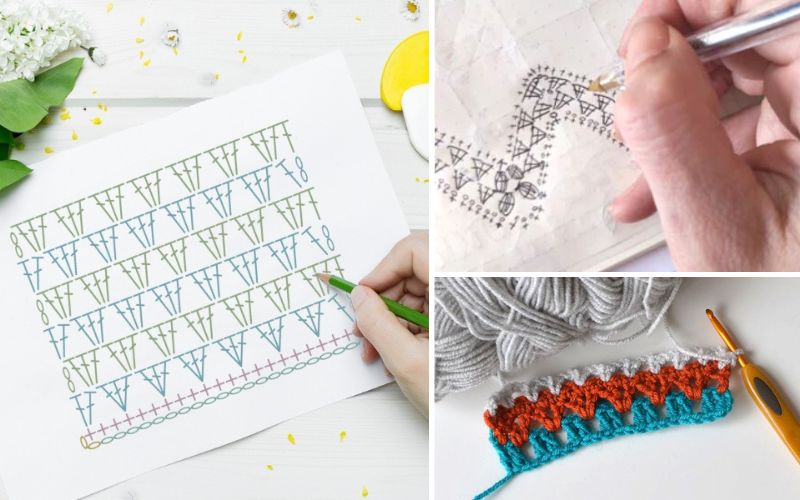
How to Read and Write Crochet Diagrams
Crochet diagrams are graphical representations of crochet patterns that illustrate the placement of stitches and their relationships to one another. These diagrams are a visual aid that can be used to make the crochet pattern easier to understand, especially for people who are visual learners. In this article, we will discuss how to read and write crochet diagrams.
Advertising
How to Read Crochet Diagrams
Step 1: Understand the Symbols
Crochet diagrams use symbols to represent different crochet stitches. It’s essential to learn the meaning of these symbols before reading a crochet diagram. Some common crochet symbols include:
• Chain stitch – a small dot • Single crochet – a filled-in dot • Double crochet – a small open square • Half double crochet – a small “T” • Treble crochet – a tall open square • Slip stitch – a diagonal line
Step 2: Read the Chart Key
Before reading a crochet diagram, it’s important to review the chart key. The chart key explains the meaning of the symbols used in the diagram. It also provides additional information about the pattern, such as the stitch multiples and any repeats.
Step 3: Follow the Diagram
Crochet diagrams are read from the bottom up, and each row is represented by a horizontal line. The numbers on the left side of the diagram represent the row numbers. The diagram illustrates the placement of each stitch in the row. The first stitch in each row is usually indicated by a small arrow.

To read the diagram, start at the bottom and work your way up, following the arrows and symbols as you go. Be sure to pay attention to any repeats or stitch multiples indicated in the chart key.
Step 4: Check the Written Instructions
Crochet diagrams are a visual aid, but they are not a replacement for written instructions. It’s important to review the written instructions to ensure that you understand the pattern correctly. The written instructions may provide additional details or clarification that are not included in the crochet diagram.
How to Write Crochet Diagrams
Step 1: Plan the Pattern
Before creating a crochet diagram, you must plan the pattern. Decide on the type of stitch pattern you want to create, the stitch multiples, and any repeats.
Step 2: Choose a Crochet Diagram Symbol Set
There are several crochet diagram symbol sets to choose from, including the Craft Yarn Council (CYC) symbol set and the International Crochet Symbols (ICS) symbol set. Choose the symbol set that you are most comfortable using.
Step 3: Create the Diagram
To create the crochet diagram, use a grid paper or crochet diagram software. Start at the bottom of the chart and work your way up. Use the symbols from your chosen symbol set to represent each stitch in the pattern.
Be sure to include any stitch multiples and repeats in the chart key. It’s also helpful to label the rows and provide written instructions for the pattern.
Step 4: Test the Pattern
Once you have created the crochet diagram, test the pattern by following the diagram and written instructions. Check for accuracy and clarity, and make any necessary adjustments.
In conclusion, crochet diagrams are a useful tool for both reading and writing crochet patterns. Learning how to read and write crochet diagrams can make it easier to follow and create crochet patterns. With practice, you can become proficient in using crochet diagrams and create beautiful crochet projects.
Access the step by step here.
If you liked this crochet pattern, but want to see some more options, below you will have other options:
We wish all our readers an excellent week, full of God’s blessings in their homes, good health, peace, love, harmony and, mainly, many and many handicraft patterns with crochet threads. Good crocheting to all, sincerely Mommy Crochet!


