Upgrade Checklist: iPhone/Android Backup, Transfer & Setup
Advertising
Phone upgrade checklist made for you: back up, transfer everything, activate eSIM, and safely wipe the old device.
Why this phone upgrade checklist saves your time and your data
Upgrading should feel exciting, not risky or confusing.
This phone upgrade checklist walks you through backup, transfer, eSIM activation, and safely wiping the old device.
Each step is lean, fast, and platform-aware for both iPhone and Android.
You will create a clean, verified backup, move everything that matters, and leave nothing sensitive behind.
This article is independent and informational, and it does not have affiliation with brands or carriers cited conceptually here.
Pre-flight: five-minute preparation before anything else
The best upgrades start with small details that prevent big headaches.
- Charge both phones above fifty percent to avoid interruptions during transfer.
- Connect to reliable Wi-Fi so backups and app restores run quickly.
- Update iOS or Android to the latest version available on each device.
- Find your account passwords for Apple ID or Google and any two-factor codes.
- Clean storage on the old phone by deleting obvious duplicates and large unused videos.
Backup on iPhone: secure snapshot in under five minutes
A good backup is your safety net against accidents or failed transfers.
- Open Settings and confirm your Apple ID is signed in and two-factor is active.
- Turn on iCloud Backup and tap Back Up Now to capture a fresh snapshot.
- Verify that Photos sync is complete if you rely on cloud photo storage.
- Create an encrypted computer backup for extra safety if you store health or keychain data.
- Check that Messages in iCloud is enabled if you want seamless message history.
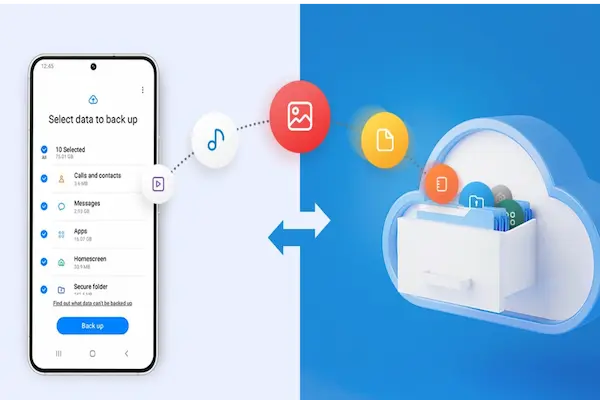
Backup on Android: Google first, plus optional local copy
Android gives you robust cloud backups with an easy local fallback.
- Open system settings and confirm your Google account backup is turned on and current.
- Ensure Contacts, Calendar, Photos, and Drive are syncing without pending items.
- Back up your messaging app if it requires its own export or cloud toggle.
- Run a manual Photos backup and confirm it finishes to avoid missing albums.
- Optionally create a local computer copy of your DCIM and Documents folders for peace of mind.
Upgrade path choices: cable, Wi-Fi, computer, or cloud
Pick the path that matches your time and gear.
- Phone-to-phone over Wi-Fi: Easiest for most users, good speed, minimal steps.
- Phone-to-phone with cable: Fast and reliable when both devices support direct cabling.
- Cloud restore: Clean setup that downloads your content and apps afterward.
- Computer-assisted: Precise control for encrypted backups and one-click restores.
Transfer data to new iPhone: the streamlined flow
Apple’s device-to-device wizard handles most content in one pass.
- Place old and new iPhones side by side with screens unlocked and Bluetooth on.
- Start the new iPhone and follow the on-screen prompt to bring data from the old device.
- Approve the pairing animation and confirm your Apple ID when asked.
- Select Transfer from iPhone and keep both phones plugged in for faster migration.
- Wait for the progress bar to finish and complete remaining setup screens on the new phone.
Alternative: restore to iPhone from cloud or computer
Use this if you prefer a clean slate or recently created an encrypted backup.
- Choose Restore from iCloud to pull your latest snapshot over Wi-Fi.
- Choose Restore from Computer if you created an encrypted backup with all settings and keychain.
- Keep the phone on power and Wi-Fi while apps and photos redownload in the background.
Move to Android: Google backup plus brand tools
Modern Android setup detects your old device and offers an optimized transfer.
- Start the new Android phone and connect to Wi-Fi and your Google account.
- When prompted, choose to copy apps and data from your old phone.
- Use a cable if available for maximum reliability and speed, or use Wi-Fi nearby.
- Pick the content types you want, such as apps, photos, messages, and settings.
- Let the restore complete and keep the phone charging while apps install.
Brand-specific accelerators you can trust
Vendors provide extra polish for their own ecosystems.
- Use the official transfer app from your phone brand for the smoothest experience.
- Enable the option to bring home screen layouts and wallpapers where supported.
- Verify that messaging history and media restored fully after the initial boot.
Cross-platform moves: iPhone ↔ Android without losing essentials
Crossing platforms takes a few extra minutes, but it is straightforward.
- Sync contacts and calendars to a common cloud account that both platforms support.
- Export messaging where the app allows a platform-agnostic backup format.
- Move photos through cloud libraries rather than ad-hoc cables to preserve albums and metadata.
- Reinstall banking, authenticator, and two-factor apps and rebind them to the new device.
- Turn off platform-specific services on the old phone after you confirm new device sign-ins.
Fast eSIM activation on your new device
Digital SIM profiles make upgrades cleaner and safer than swapping plastic.
- Check that the new phone is carrier unlocked or eligible for activation on your plan.
- Find your eSIM option in cellular settings and look for Add eSIM or Set up Mobile Plan.
- Choose one method among QR code, carrier assignment, or device-to-device transfer.
- Keep Wi-Fi enabled and wait for the plan to download and show as Active.
- Set the default line for data, calls, and messages if you use dual SIM.
If you need to convert a physical SIM to eSIM
Many devices support on-device conversion without contacting support.
- Open cellular settings and look for Convert to eSIM on the line you want to migrate.
- Follow the on-screen prompts and keep the phone on power during conversion.
- Test calls, messages, and data before discarding the plastic card.
Account hygiene: apps, passwords, and two-factor that follow you
Your number and your accounts are tightly linked, so treat them with care.
- Confirm that your password manager unlocks on the new phone and autofill works as expected.
- Readd your email accounts and verify that calendars and contacts appear correctly.
- Open each authenticator app and migrate tokens using its built-in export or recovery process.
- Update two-factor numbers in critical accounts if your phone number changed.
- Re-enroll biometrics in banking and wallet apps for smooth sign-ins.
Messaging and calling: make the new phone your default everywhere
Small toggles keep conversations flowing without duplicates or missed calls.
- Set the new device as the default for calls and SMS on your account.
- Re-register number-bound services such as iMessage, FaceTime, or RCS after activation.
- Open your primary chat apps and complete number verification where required.
- Review per-contact defaults if you use dual SIM and assign the right line for family and work.
- Place a test call and send a test message to confirm everything routes correctly.
Photos, videos, and media libraries: verify before you wipe
Media is the most personal data you own, so double-check the migration.
- Open your photo app and scroll several months back to confirm older items exist.
- Search for specific albums, live photos, bursts, and edited versions to validate depth.
- Check that downloaded playlists and podcasts reappear in your media apps.
- Redownload purchased items only after you confirm sign-in to the right store account.
- Keep the old phone on Wi-Fi for an hour to let any remaining cloud sync finish.
Wearables and accessories: pair once and forget
Bring your watch and earbuds along with minimal friction.
- Unpair your watch from the old phone to create an up-to-date backup if required.
- Pair the watch with the new phone and check that messages and calls mirror correctly.
- Reset and re-pair earbuds to the new device to avoid audio routing confusion.
- Reconnect car Bluetooth and test calls, maps prompts, and media playback.
- Update firmware on accessories to ensure the best battery and stability.
Privacy and security after the move: tighten the new device
Finish strong with settings that protect your identity and your data.
- Enable a strong passcode and biometric unlock and disable simple codes.
- Turn on device-finding services and test the ability to ring or locate your phone.
- Review app permissions and revoke access that is no longer needed.
- Enable SIM change alerts and account sign-in notifications where available.
- Set up automatic cloud backups on the new device and run one initial manual backup.
Reset old phone: wipe safely and responsibly
Do not resell, trade in, or donate until your personal data is fully removed.
- Turn off platform services tied to your identity such as device-finding or cloud locks.
- Sign out of your Apple ID or Google account on the old phone.
- Remove any eSIM or SIM profiles if the carrier requires it before resale or trade-in.
- Perform a full factory reset and erase all content and settings.
- Do not enter any accounts during the post-reset welcome screen and power it down.
Fifteen-minute quick path: the fastest safe upgrade
Use this condensed route when you need results now and details later.
- Old phone: run a manual cloud backup and confirm completion.
- New phone: update the system software on first boot if prompted.
- Choose device-to-device transfer with both phones plugged into power.
- Activate or transfer eSIM during setup and set the data line defaults.
- Log in to password manager, email, and primary chat app immediately after setup.
- Test a call, an SMS, and a web page, then verify several months of photos.
- Schedule a thirty-minute follow-up tonight to finish wearables and extras.
Troubleshooting: quick fixes that solve most upgrade snags
Most issues resolve with clean connectivity and one or two targeted resets.
- If the transfer stalls, keep both phones on chargers and Wi-Fi and restart the transfer step.
- If the eSIM shows no service, toggle Airplane mode for a minute and restart the phone.
- If messages appear on the old device, re-register services on the new phone and wait a few minutes.
- If apps fail to install, open the store app and tap Retry or clear the pending download queue.
- If photos are missing, leave the new phone on Wi-Fi and power overnight to complete sync.
- If authenticator codes do not work, restore from the app’s secure backup or use recovery codes.
Post-upgrade housekeeping: keep performance crisp
A few minutes now prevents slowdowns and storage crunch later.
- Delete obvious duplicates in the Photos library created during old exports.
- Clear temporary downloads and offline caches in streaming and social apps.
- Enable automatic updates for apps and the operating system on a daily schedule.
- Set battery optimization rules for any backup apps that run in the background.
- Create a quarterly reminder to review storage, backups, and security settings.
Optional power moves for advanced users
These steps fine-tune reliability and make future upgrades even faster.
- Keep a small text note with your upgrade sequence and account checklist for next time.
- Use labels for dual SIM lines so the right number dials by default per contact.
- Export two-factor tokens to a secure backup when your authenticator supports it.
- Stage a minimal offline media pack for travel with maps, tickets, and essential playlists.
- Test your phone’s recovery pathways by signing into a secondary device and verifying access.
Phone upgrade checklist, transfer data to new iphone, smart switch, google backup, reset old phone
Run through this once more before you box up the old phone.
- Fresh iPhone or Android cloud backup completed and verified on the old device.
- Critical photos, videos, and messages visible on the new phone after restore.
- Passwords and authenticator apps working and two-factor codes accepted.
- eSIM activated or transferred and the correct line set for data, calls, and messages.
- Primary chat apps verified with your number and notifications enabled.
- Watch, earbuds, car, and other accessories paired and updated.
- Security hardened with strong passcode, biometrics, and device-finding enabled.
- Old phone signed out, eSIM removed if required, and factory reset completed.
- Quarterly reminder created for storage, backup, and security health checks.
Editorial note
This content is people-first and purely informational to help you upgrade smoothly and safely.
We do not have affiliation with carriers, device makers, apps, or platforms referenced conceptually here, and features or availability can change without notice.
Validate device eligibility, activation steps, and plan policies in official sources before making changes.
When you follow this phone upgrade checklist, you move fast, keep your data safe, and start enjoying your new device immediately.